Bitter chrysanthemum clears the liver and improves eyesight (cooling in nature) & bitter melon clears heat and promotes diuresis (cold in nature) Cumin regulates qi and stimulates appetite (warming in nature) & duck meat nourishes yin and moistens dryness (warming in nature) Perfect for office workers who spend long hours in front of the computer/are irritable/have no appetite in hot weather 😇🙃👿😡😎 *10L mini oven, parchment paper 20*15cm, 4 dough balls, baked in 2 trays* Savory Bread (Soft European Style) Salt 2%, Sugar 5%, Oil 7% (flour ratio) This time I used whole wheat flour/rye flour/black bean flour. The vegetables themselves contain water, so I used 60% water (high-quality high-gluten flour uses 70% water). The oil is a blend—1/3 walnut oil + 2/3 duck oil (refrigerated stewed duck leg, the oil is light yellow/has a spice and meat flavor) *Cooked duck leg meat ✂️ cut into small pieces, be careful not to mix in any small bone fragments! Sprinkle with a little cumin powder to enhance the flavor (or add cumin to the flour?). After baking, brush the surface with a little honey for a more layered flavor. *250g flour + 138g duck meat + a little vegetable, yields 600g. Use a peeler to scrape slices of bitter melon; use sparingly as it will leave a slightly bitter taste in the bread! This time, I didn't use the Polish starter + water method. A cloudy day with 26℃ and 61% humidity was perfect for proofing the dough. I directly added water and kneaded the dough, then slapped it for 8-10 minutes to incorporate more air, sprinkled flour, and let it rise for the first time. After degassing and dividing, I covered it with vegetables and duck meat, shaped it, and let it rise a second time—it went very smoothly! Much better than kneading in 37℃ heat the day before yesterday! 🤣🥵
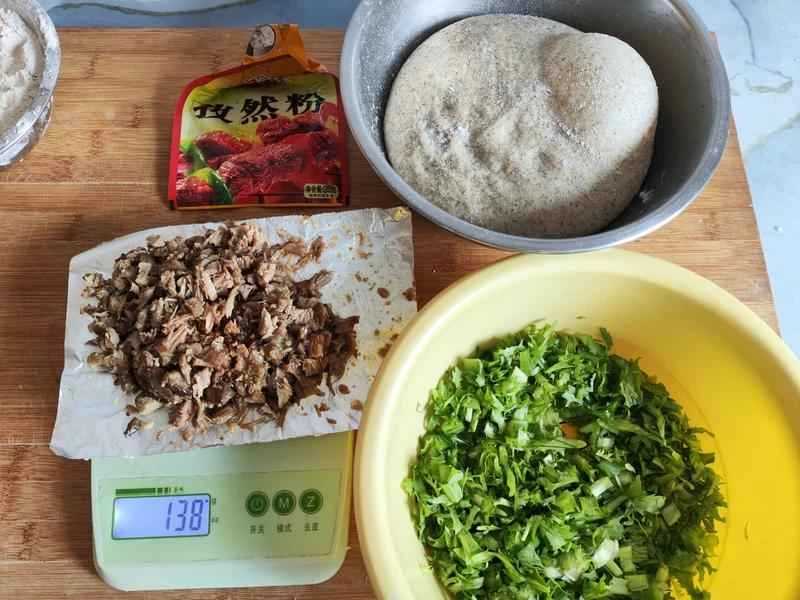
Materials
Steps for making savory European-style bread with bitter chrysanthemum, bitter melon, cumin, and duck leg
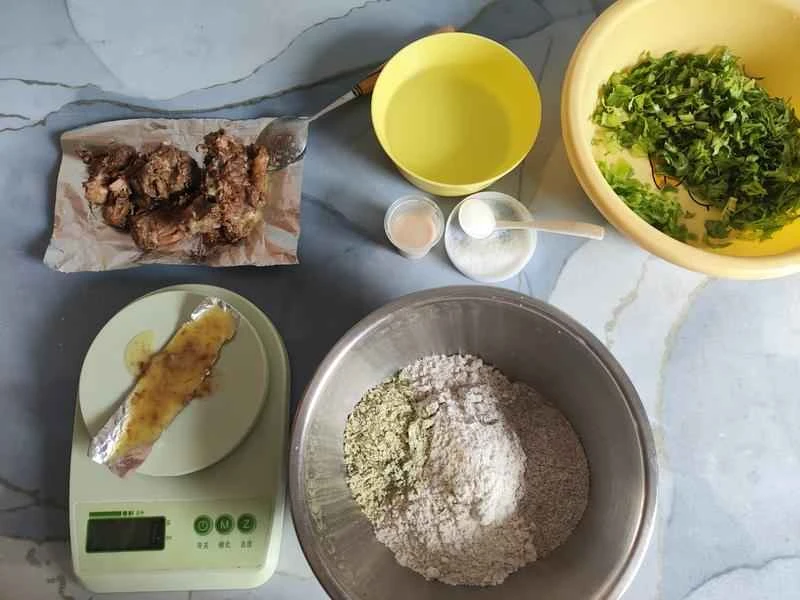
Whole wheat flour 210g, rye flour 25g, black bean flour 15g, fresh yeast 7.5g, warm water 175g (actual usage 150g), white sugar 12.5g, salt 5g, walnut oil 5g + duck oil 12.5g = 17.5g. Prepare the ingredients: Remove the cooked duck leg from the refrigerator to room temperature, and chop the vegetables into small pieces.
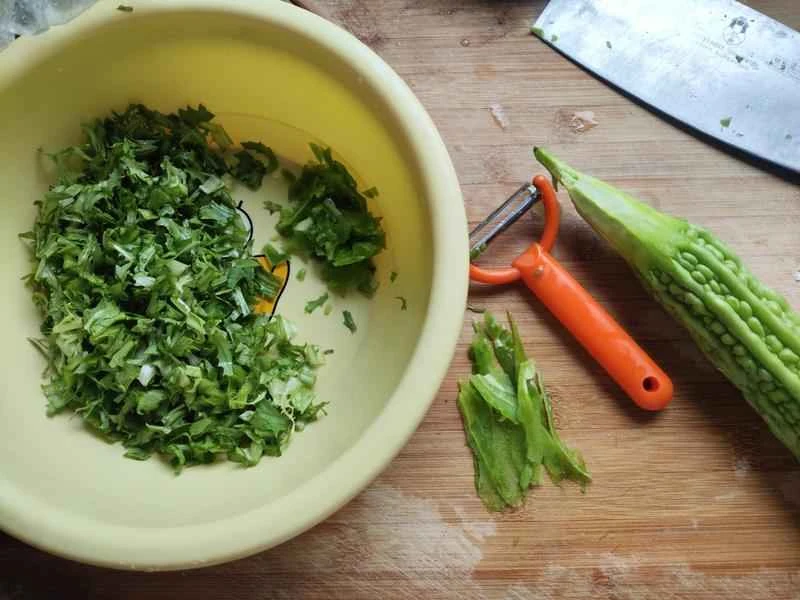
First, use a peeler to scrape thin slices of bitter melon, then cut them into short pieces...use sparingly! You can cut vegetables/cut duck leg meat during the second half of the dough's first rise.
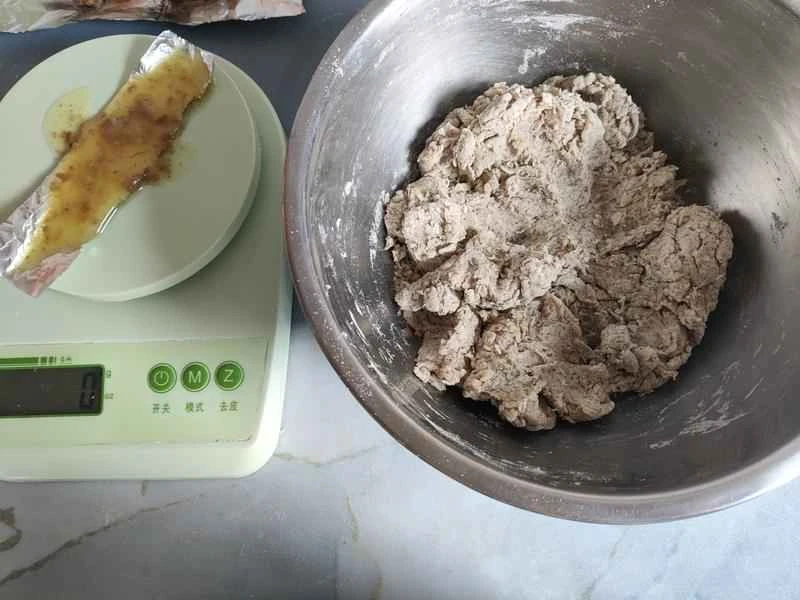
Mix the three types of flour evenly, sprinkle with sugar and mix well. First, add the fresh yeast water and stir until dissolved. Then, add warm water in two batches, stirring constantly until there is no dry flour. Spread the mixture out. Add duck fat and walnut oil, fold and knead until combined. Sprinkle salt evenly and knead into a dough.
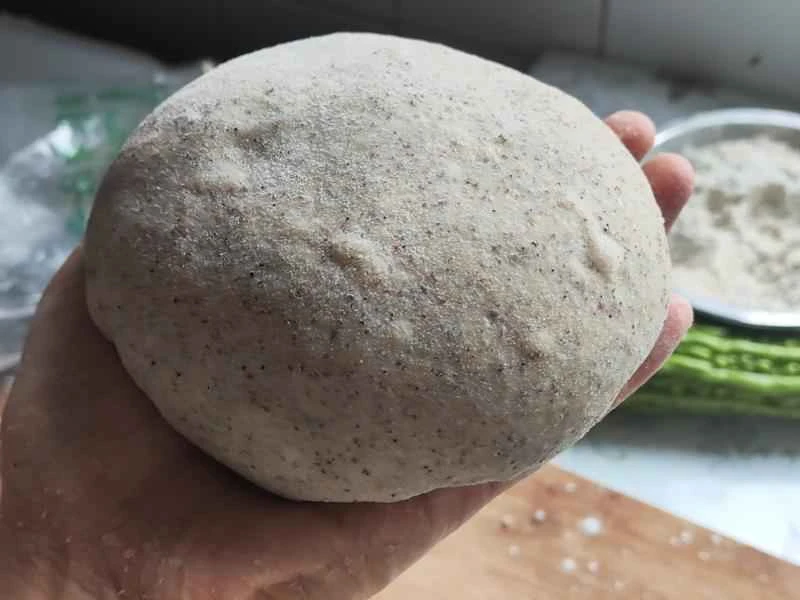
Remove the dough and stretch it on the work surface. Slap and stretch the dough 20 times as one round. Use a scraper to push and roll the dough. Let it rest for 2 minutes. Repeat 4-5 rounds or more, depending on the state and weight of the dough. Using your thumb as the center, press it onto the dough and fold it over to form a round dough that incorporates more air, creating a puffy surface.
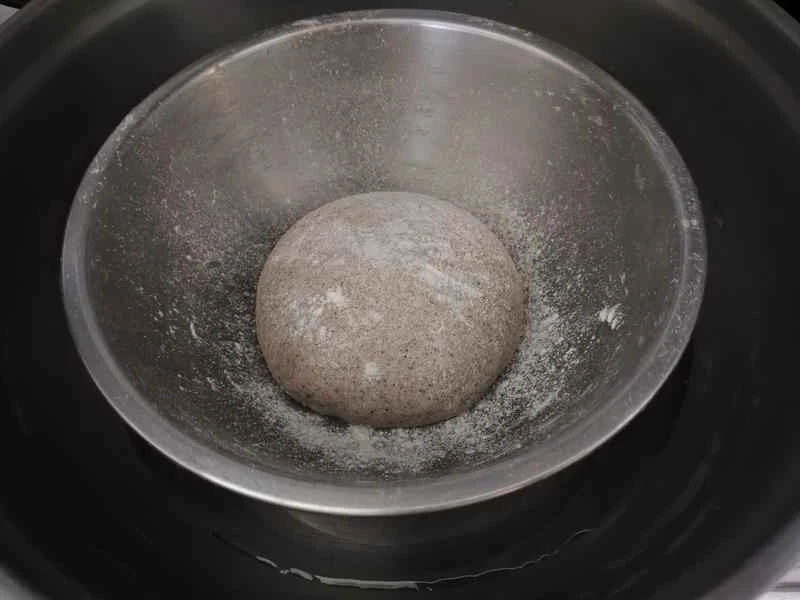
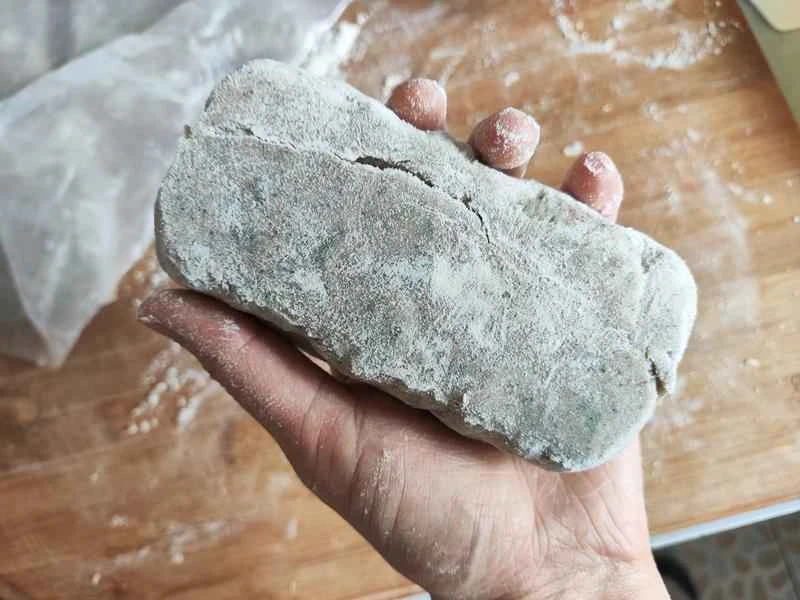
Sprinkle flour on the bottom of a bowl, then add the dough. A floured surface is sufficient for the dough. A humidity of 61% is slightly lower. Place the bowl in a pot with a little water at the bottom, cover tightly, and begin the first fermentation.
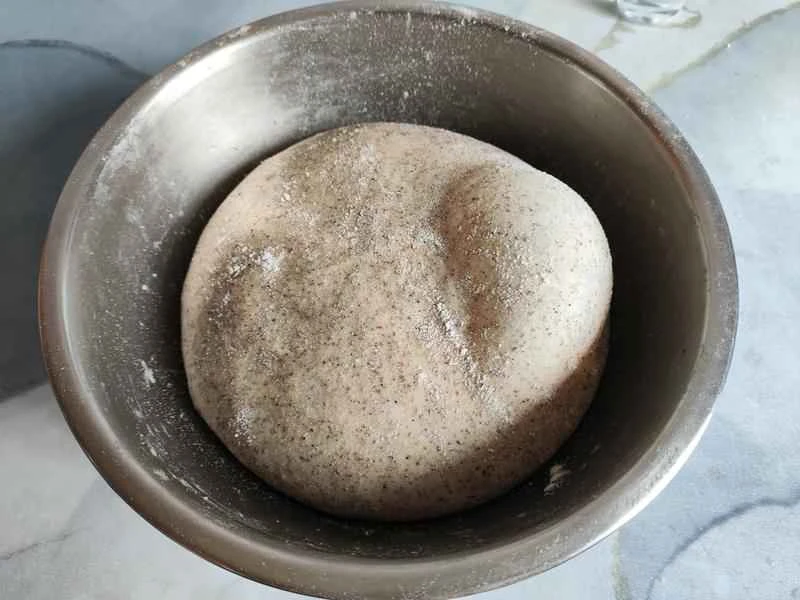
First rise took 1 hour and 18 minutes… the bubbles are a bit exaggerated 😇 It wasn't this big when I took it out of the pot… the dough got bigger after shaking it a bit. Look at those bubbles, beautiful! beautiful!! — by Richard Bertinet
Cut the duck legs into small pieces, being careful not to get any small bone fragments mixed in! They'll gnaw on your teeth! Mix the duck meat with cumin powder; the amount depends on your preference. This time the flavor wasn't too strong, or you can add cumin powder while kneading the dough for a cumin-flavored extra kick.

Sprinkle flour on the work surface, invert the bowl and the dough will fall out automatically. Sprinkle flour on the surface, gently pat to release air, shape into a square, and cut into 4 portions. Use 1 portion at a time, and cover the remaining dough with plastic wrap to keep it moist. *If the room temperature is too high, refrigerate the remaining dough first, and only take out 1 portion at a time, or work with the air conditioner on to prevent the dough from fermenting too quickly.

5-6 minutes to make one dough ball↑ Under the same conditions, the other three dough balls fermented to varying degrees.
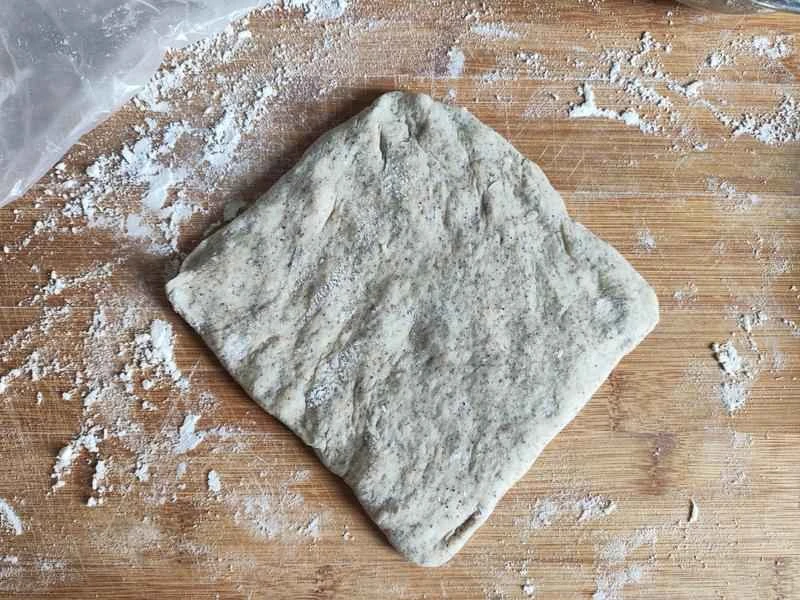
Stretch the dough into a diamond shape◇
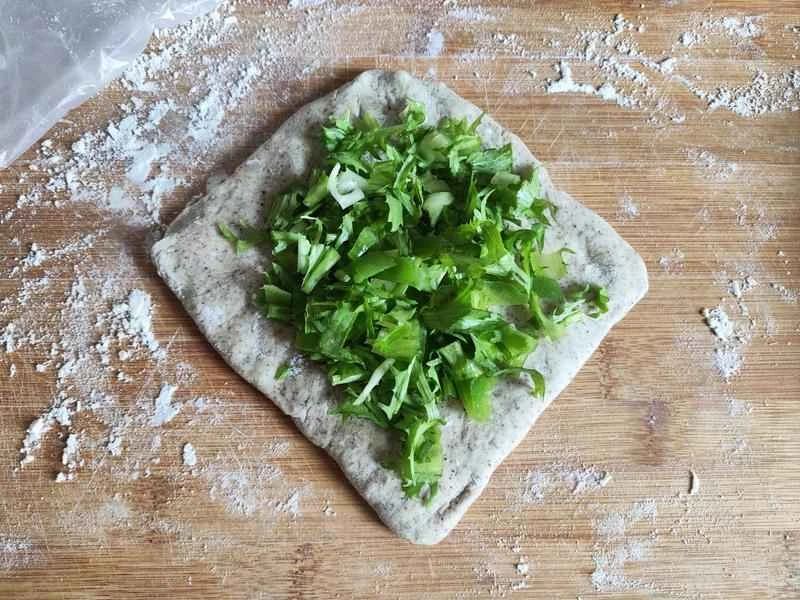
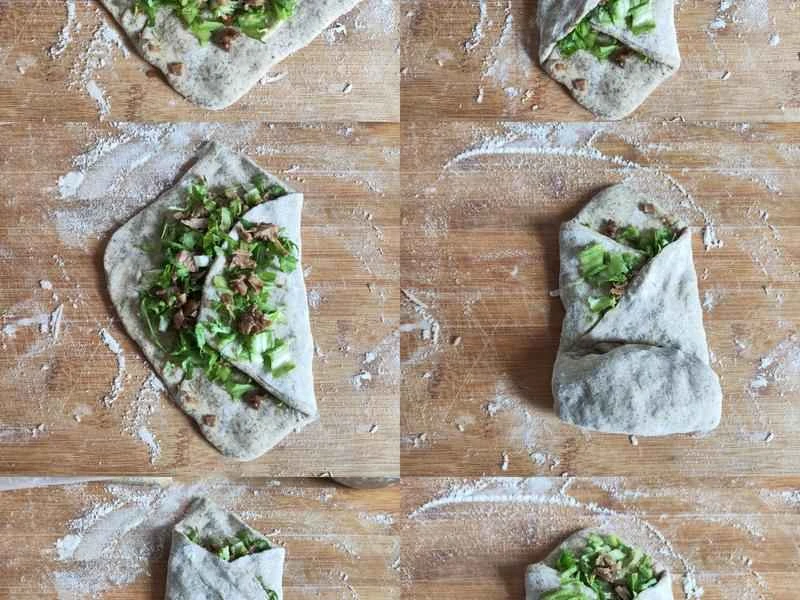
Leave a 1.5-2cm gap around the edges when laying the vegetables.
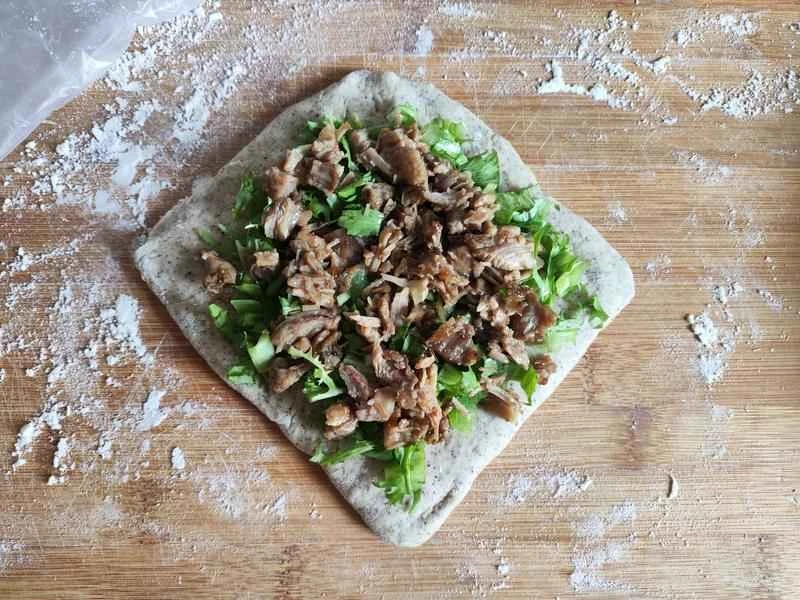
Arrange the duck meat evenly (use plenty of ingredients for the first one).
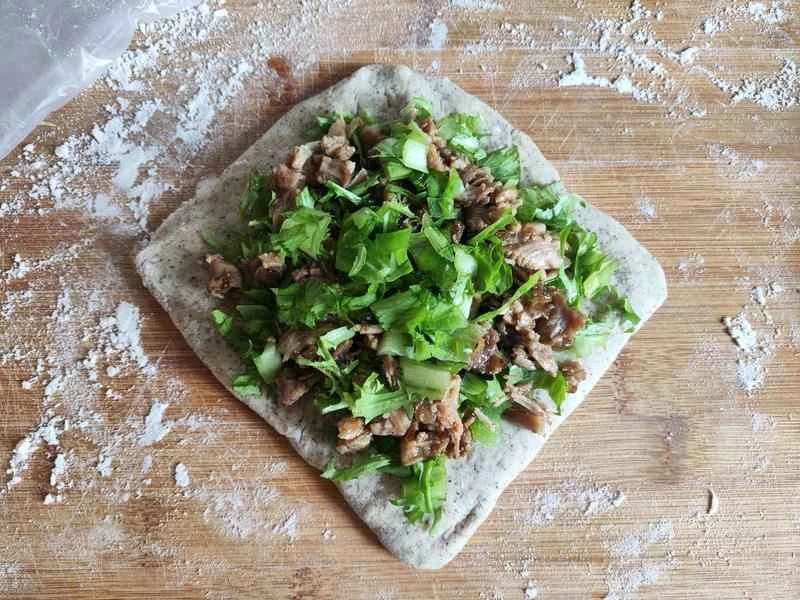
Sprinkle a little more vegetables on top of the duck meat.
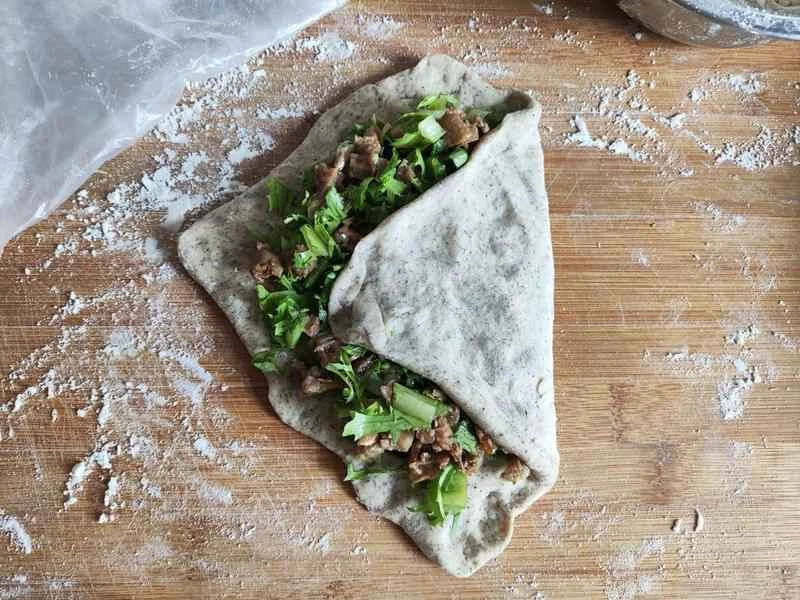
← Fold from right to left
Add the vegetables first, then a small amount of duck meat.
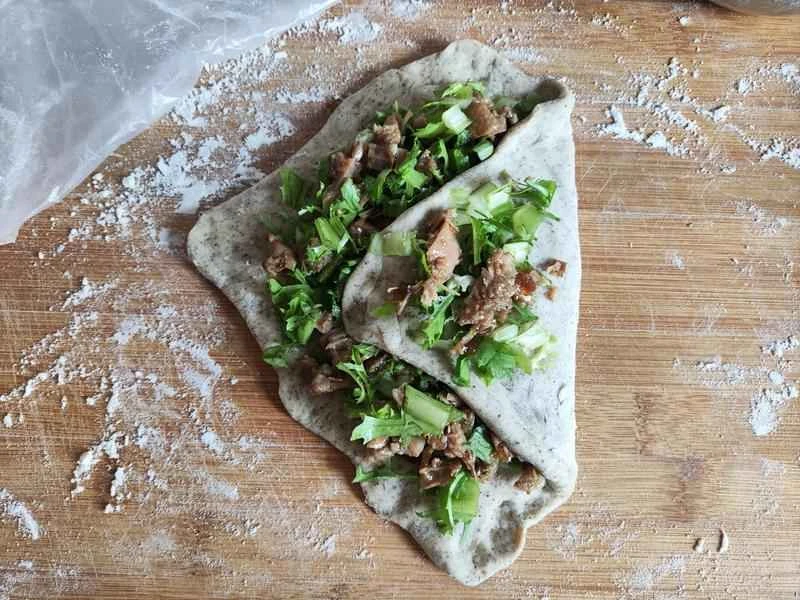
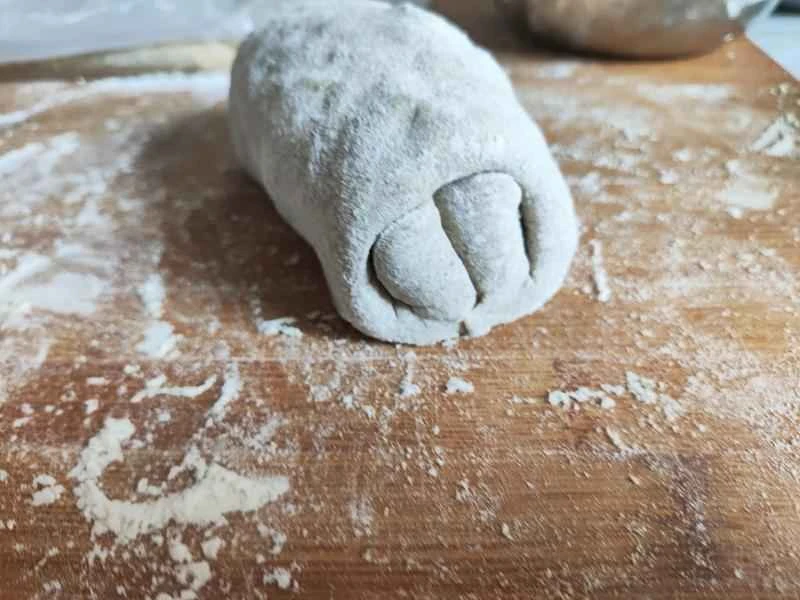
→ Fold the skin from left to right and press it slightly to lengthen it. Press it firmly in the middle with your fingertips to shape the center line of the spine.
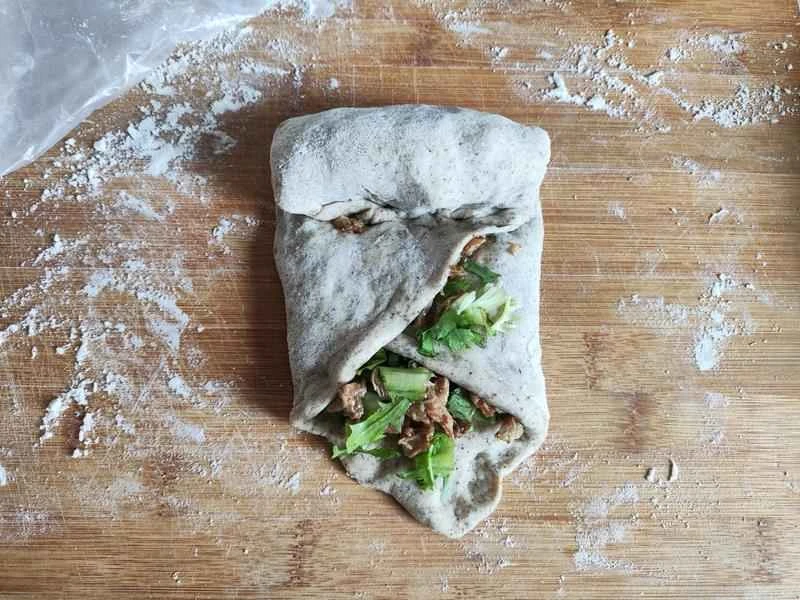
Fold from top to bottom along the center line of the spine and press firmly to tighten.
Turn to travel a few times

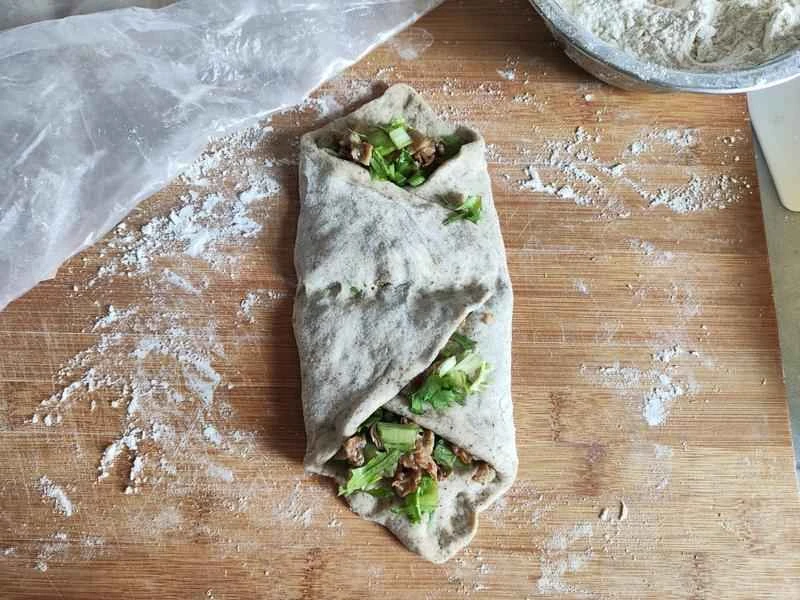
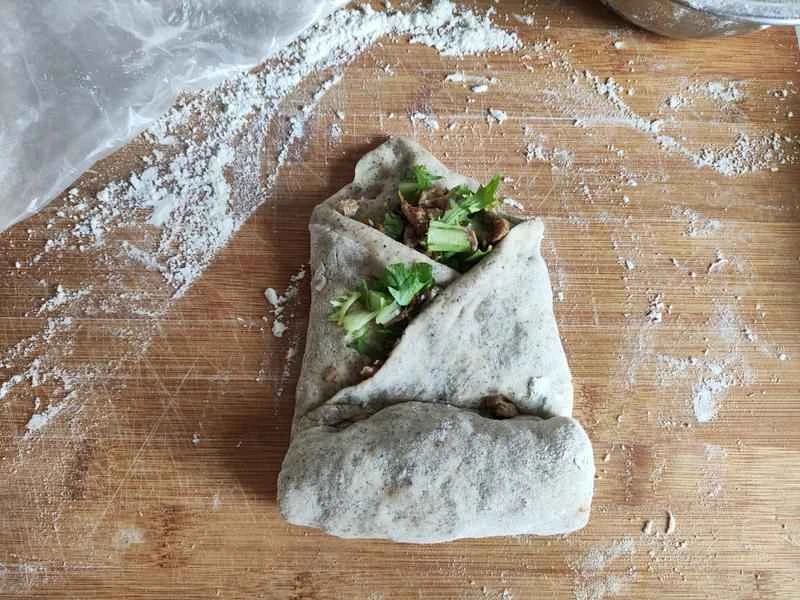
Add vegetables first, then a small amount of duck meat.
Fold from top to bottom along the center line of the spine and press firmly to tighten.
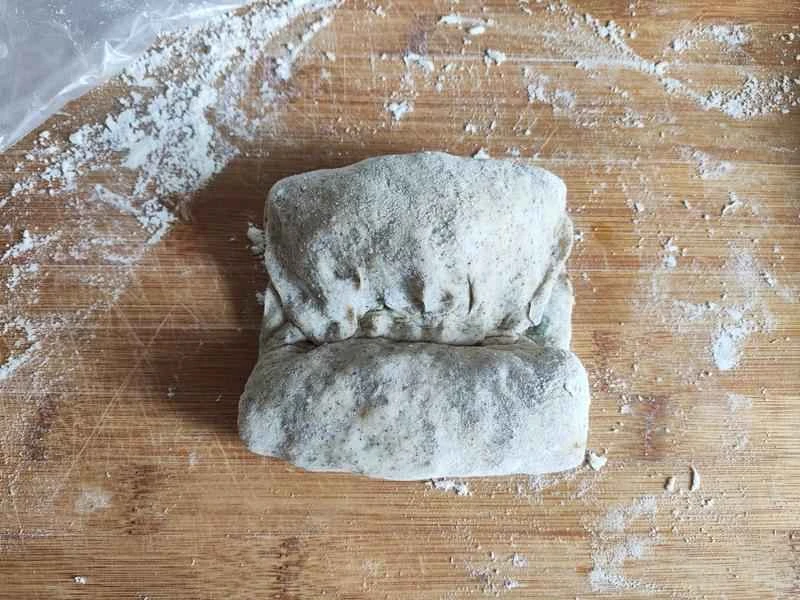
Fold the top down to the bottom.
Pinch the seams together, dip them in flour, and knead to form a round shape.

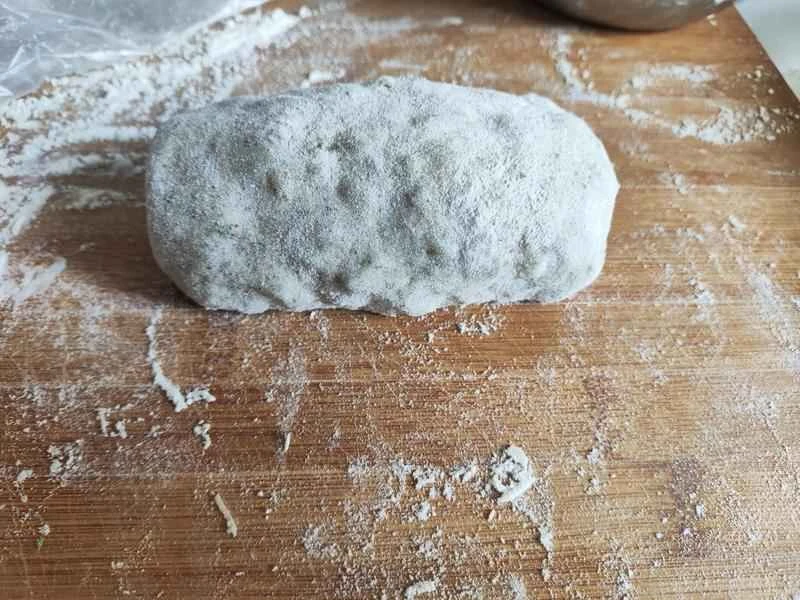
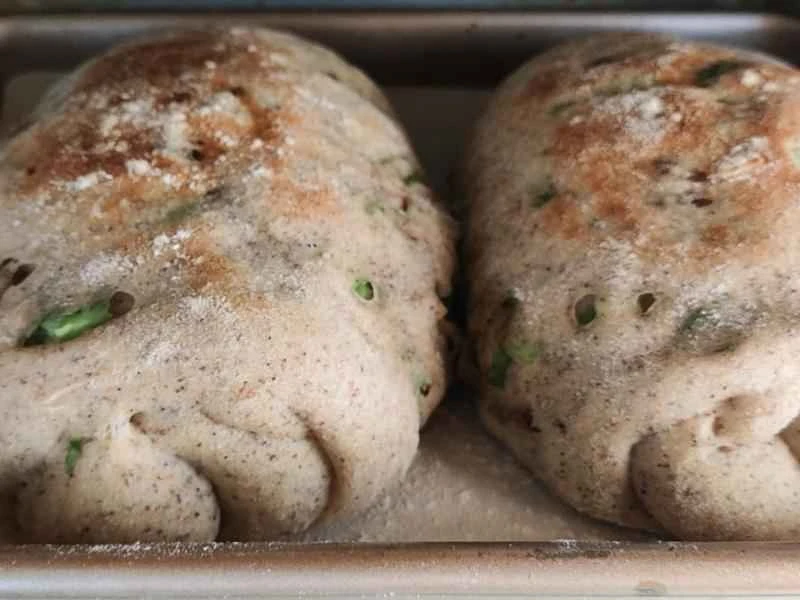
The green blank is basically similar in shape to the mold, with an arched ridge on top (the center line of the spine) for stronger expansion.
Side view~
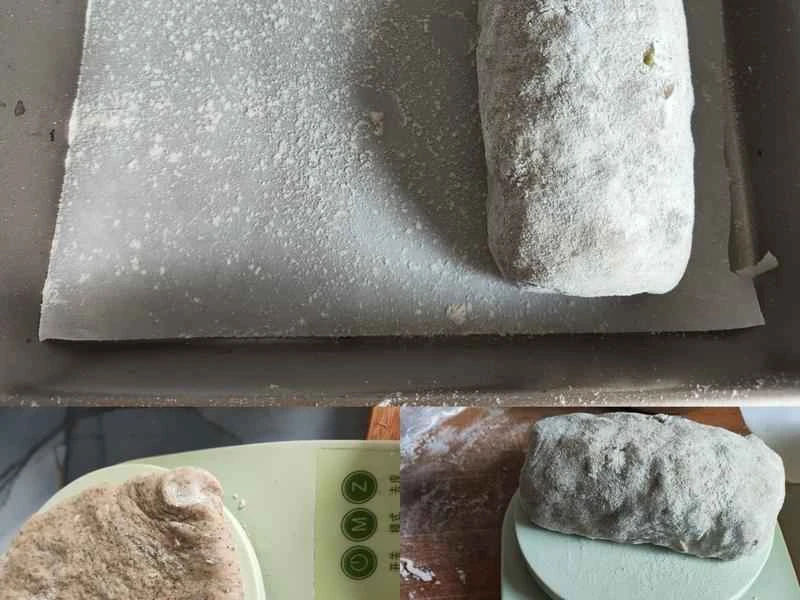
Sprinkle flour on parchment paper and then sprinkle flour on the surface of the dough for the second proofing. The first dough should have ample ingredients: 113g dough + 74g vegetables and duck meat = 187g. The following three doughs will have less vegetables and meat.
Summary of shaping steps (for the second unfinished piece)

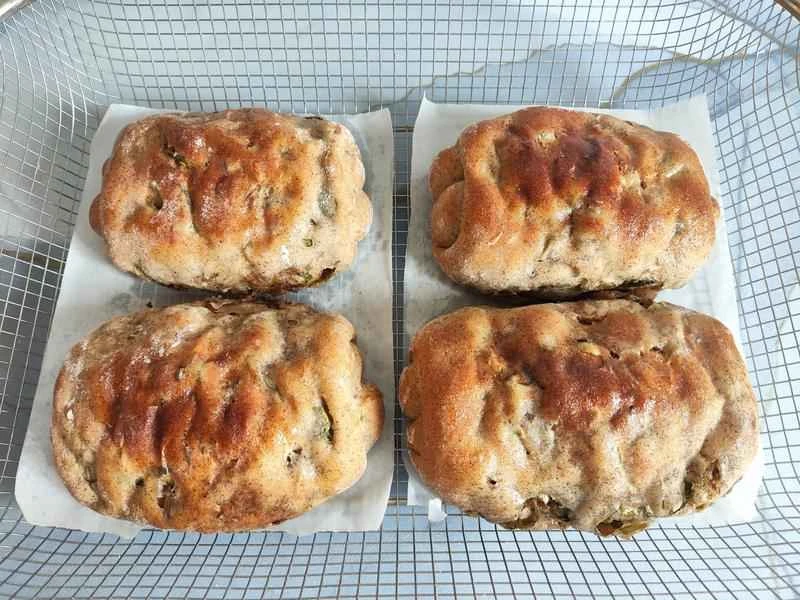
Raw material weight: 187 + 174 + 143 + 154 = 658g; Finished product weight: 600g
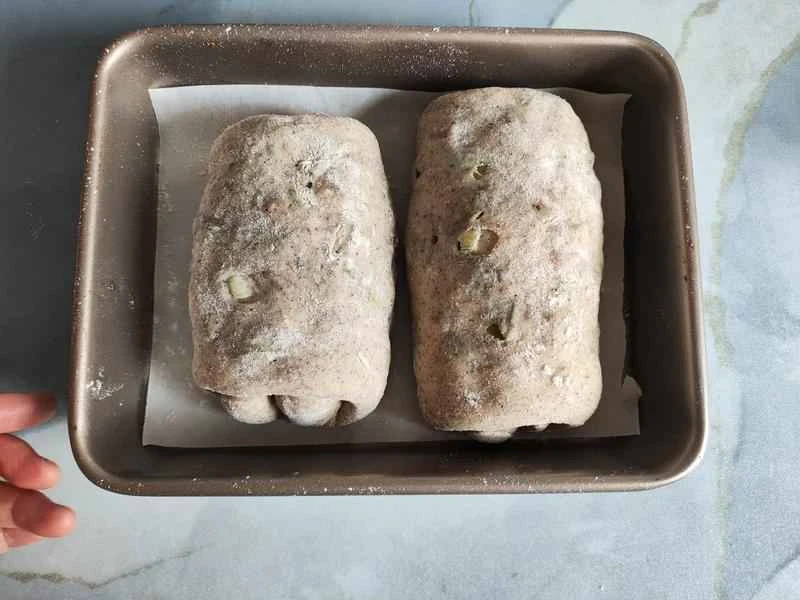
The second fermentation of the green body took 47 minutes, which was slightly over-fermented. The two green bodies were separated by 6 minutes. Actually, 40 minutes would have been just right.
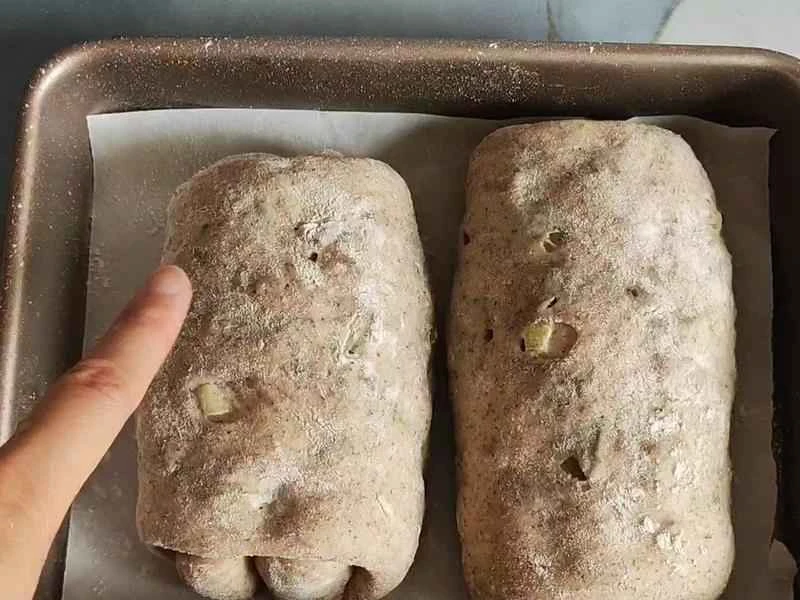
Gently touch the dough and judge its condition: No spring back and obvious marks... Over-fermented, springs back slowly and leaves shallow marks... Normally fermented, springs back quickly and leaves no marks... Under-fermented, continue proofing. ↑↑ This is in the middle of normal and over-fermented; any longer and it will be completely over-fermented.
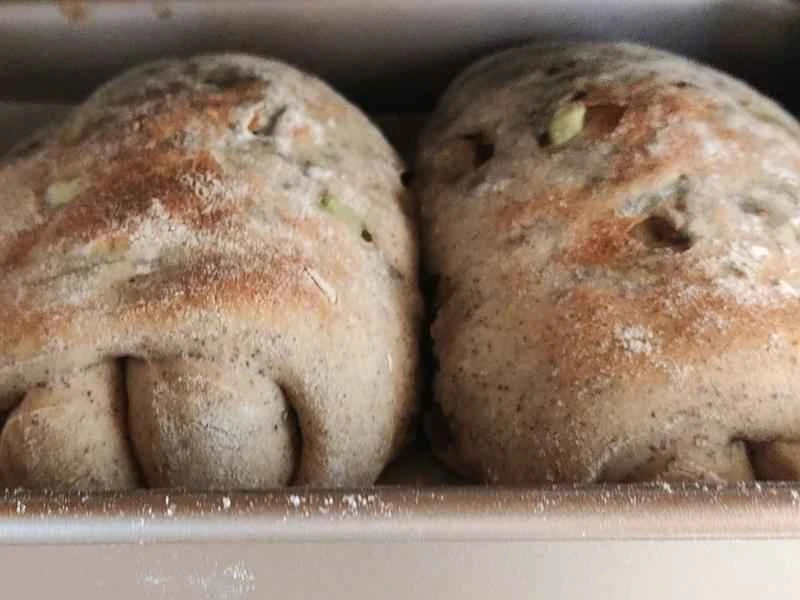
Preheat oven to 220℃ for 5 minutes (if the dough has risen too quickly, preheating time may be insufficient; 10 minutes is normal). Spray the dough with water and bake at 190℃ for 10 minutes. If the color is satisfactory, cover with aluminum foil and bake for another 5 minutes. Reduce the temperature to 180℃ and bake for 10 minutes. Rotate the baking tray and continue baking for 3 minutes. Remove the aluminum foil and bake for a final 1-2 minutes. Check the color and let it sit for 30 seconds to 1 minute. Remove the baking tray and tap it twice to release air bubbles. Let it cool on a wire rack. *For large ovens, use the lower rack and don't rotate the tray. For small ovens, the light bulb may be too close to the dough.*
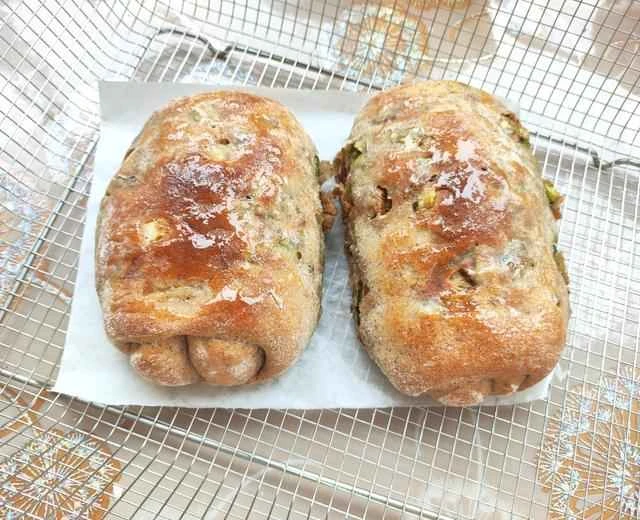
The bread was warm and smelled wonderful 😍 It was baked for a total of 30 minutes, and the aroma was especially strong from the 25th minute onwards!
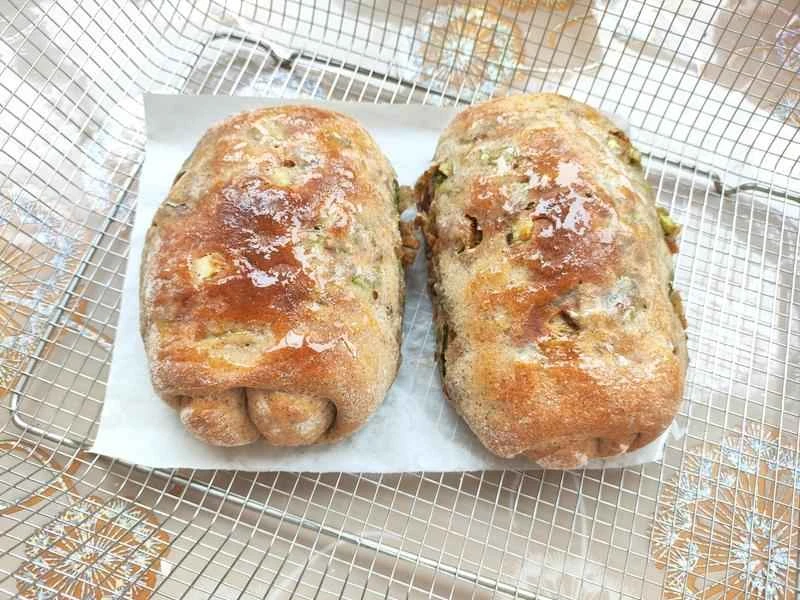
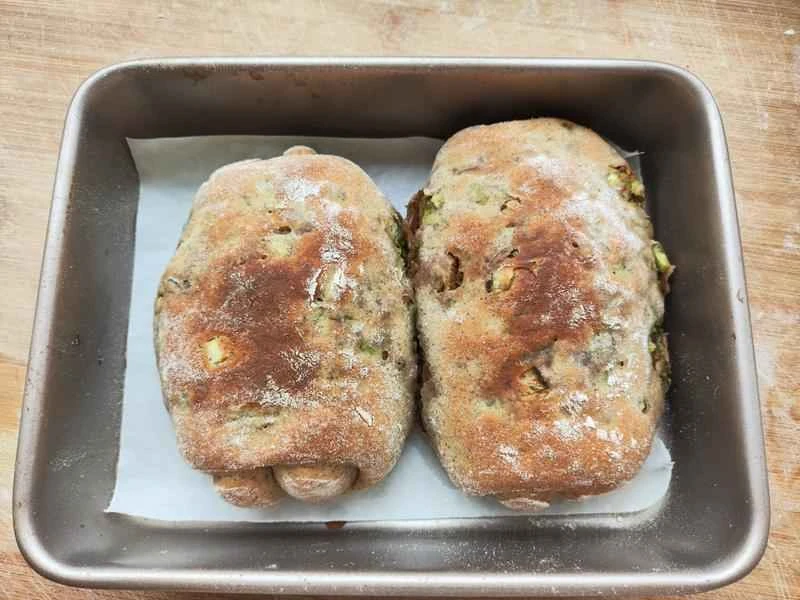
Brushing some honey on it while it's still hot will enhance the flavor; the crust will be slightly sweet, and the filling will be savory.
Spray the dough with water and bake at 200℃ for 5 minutes. If the color is satisfactory, cover with aluminum foil and bake for another 10 minutes. Reduce the temperature to 180℃ and bake for another 10 minutes. Rotate the baking tray and bake for another 3 minutes. Remove the aluminum foil and bake for a final 1-2 minutes, checking the browning. For the second batch, I tried different temperatures, increasing the temperature by 10℃, and the browning was much faster.
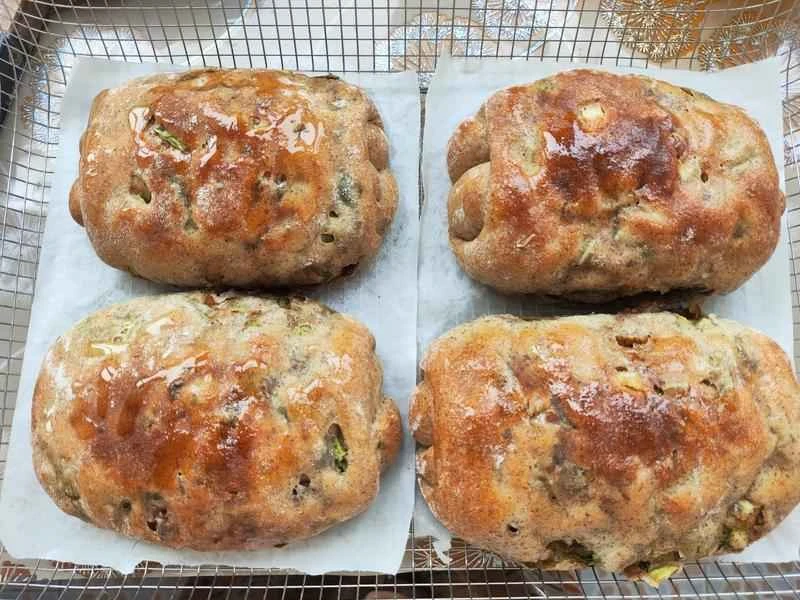
←For the second batch, drizzle honey over the dough with a spoon until it slides down naturally.→The effect of letting the first batch cool for 40 minutes: the honey gradually seeps into the dough.
The second batch cooled for 40 minutes ← → The first batch cooled for 1 hour and 20 minutes. The surface softened and wrinkled, and the honey permeated the dough.
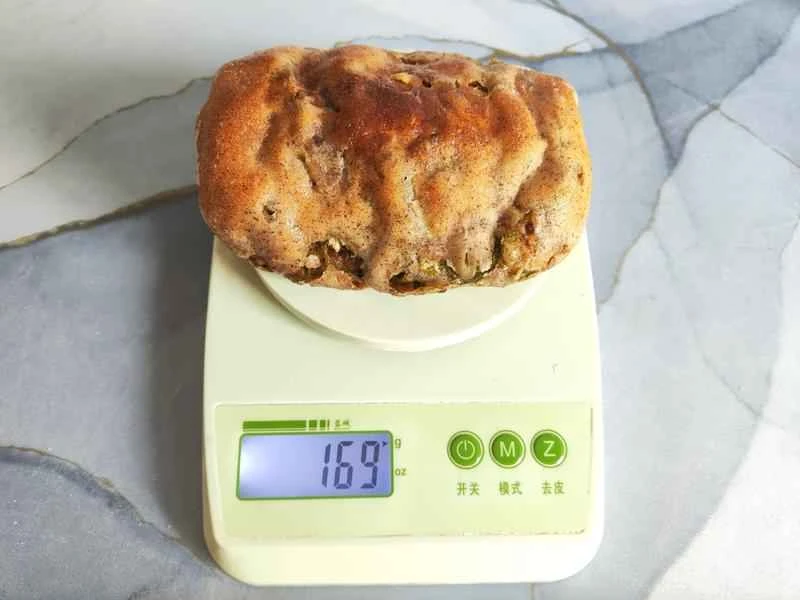
Cut one open to taste ↑ The heaviest one, weighing 187g.
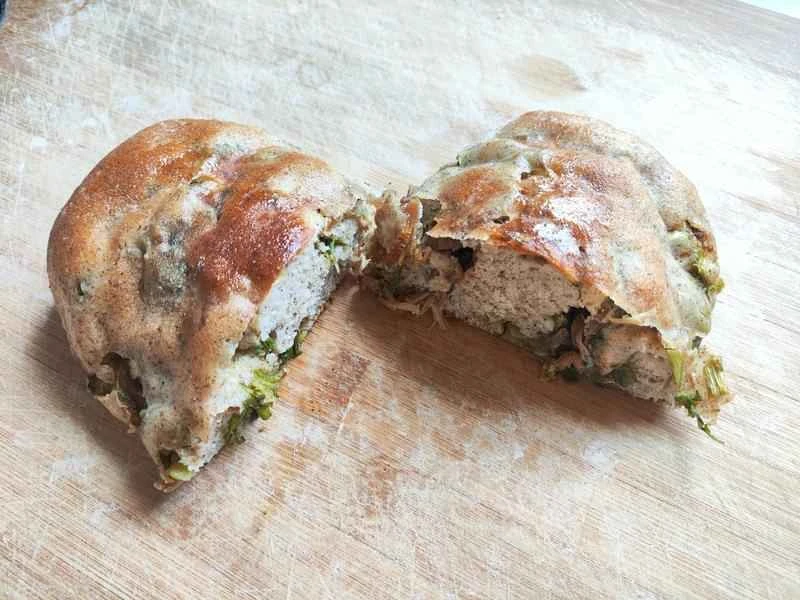
Cut in half, the outer skin is thin and the inside is soft and elastic.
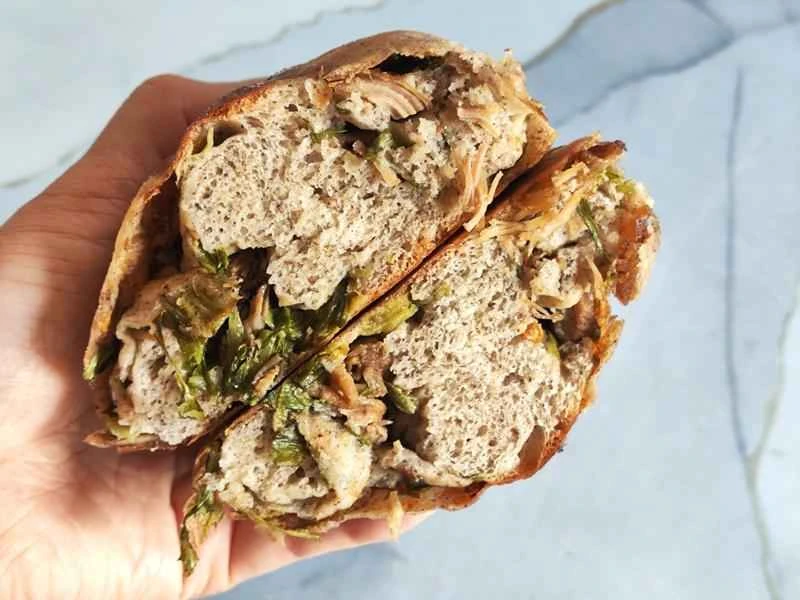
😍 The first dough is generously filled with ingredients, lots of vegetables and duck meat~~ It's lower in fat and healthier than a certain fried Chinese burger. Although there wasn't much bitter melon, it still had a slightly bitter taste, perhaps because the bitter melon was a bit dark in color and the bitterness was a bit stronger... If you choose a lighter green one, it won't be as bitter...
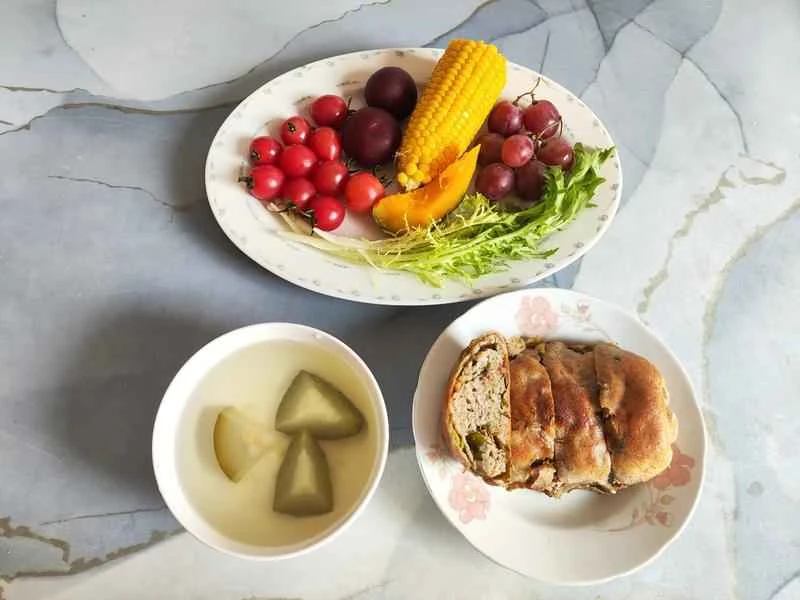
Light meals without cooking~~ Paired with winter melon drink to clear heat, generate fluids, and relieve summer heat and dampness