Materials
Steps for making pork floss and red bean pastry
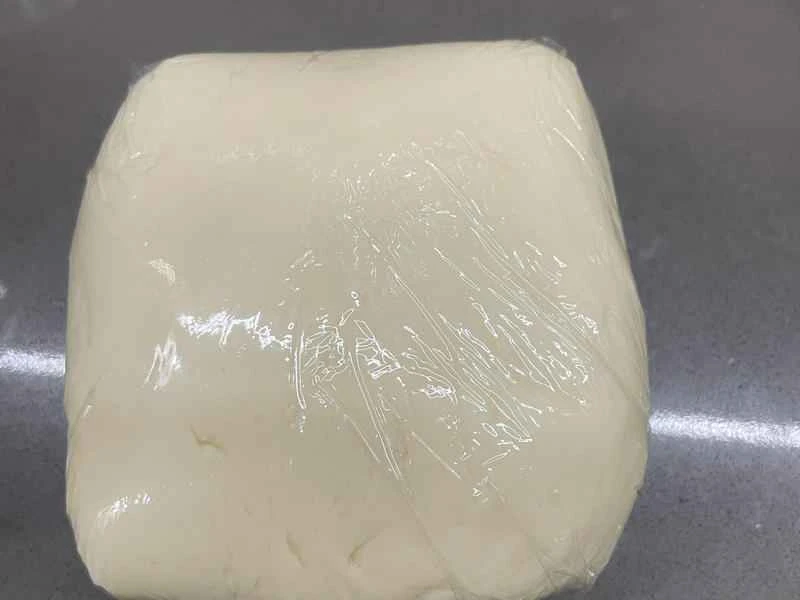
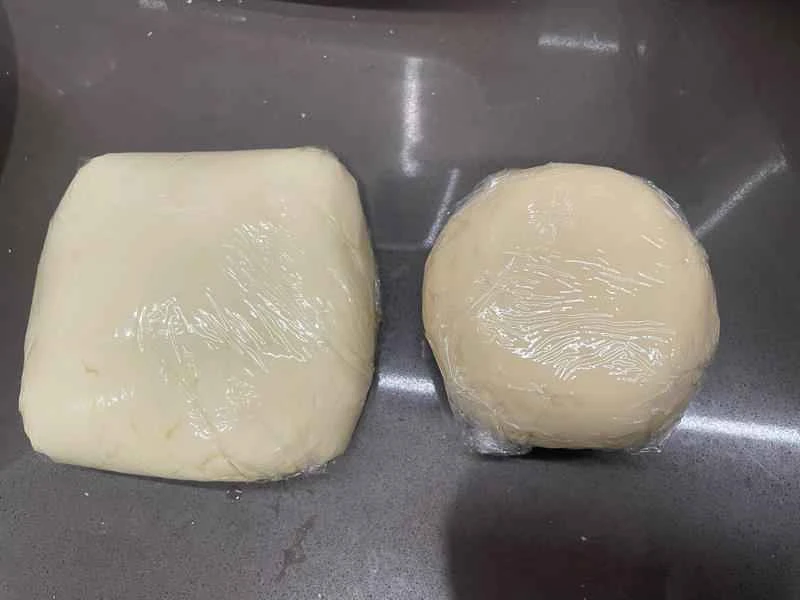
First, make the dough: Put all the dough ingredients into a stand mixer, mix the ingredients evenly on low speed, then switch to high speed for 6-8 minutes to mix the ingredients into a dough, wrap it in plastic wrap, and refrigerate it for at least 2 hours or overnight for 12 hours to relax.
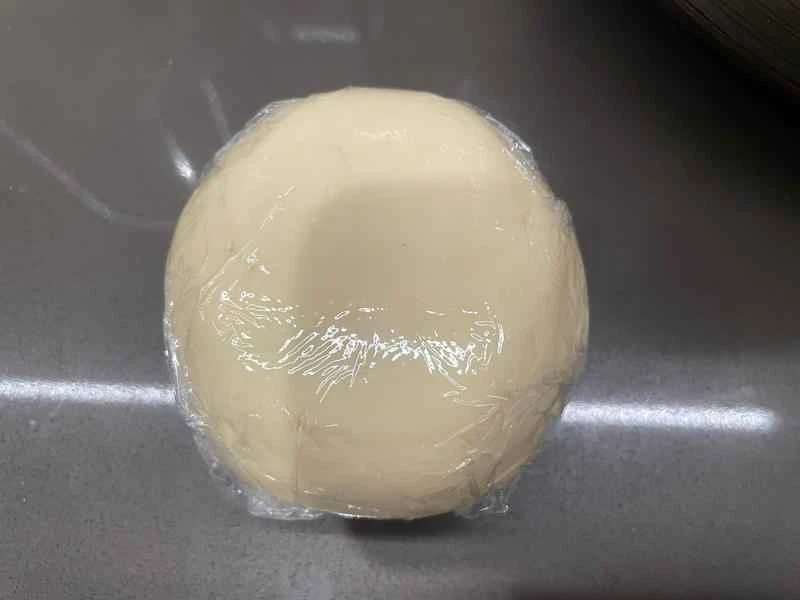
Next, make the oil-based dough: Mix the ingredients for the oil-based dough until a dough forms, wrap it in plastic wrap, and refrigerate until ready to use. (The oil-based dough doesn't necessarily need to be refrigerated to relax; it can be made beforehand.) I made both the water dough and the oil-based dough a day in advance for convenience 😁
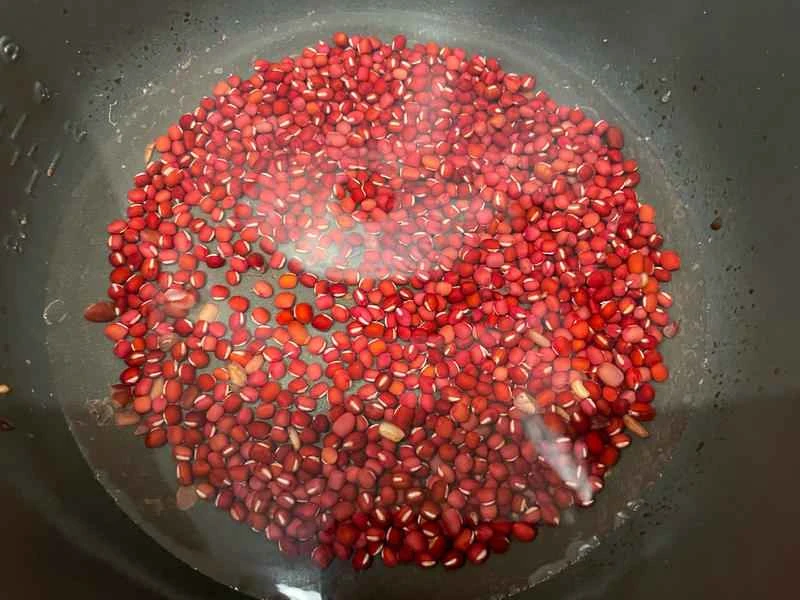
The next day, prepare the filling: Wash 200 grams of red beans and put them in a rice cooker with 530 grams of water. Press the soup button and let it simmer for an hour without opening the lid. The water should be mostly absorbed by the red beans; you can then take out a red bean and gently crush it.
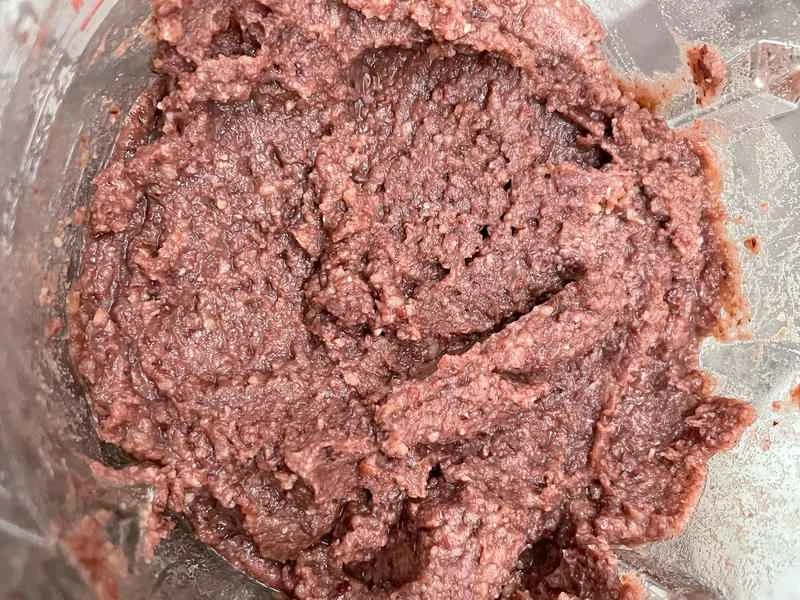
Put the red beans in a blender, add 160 grams of boiling water, and blend until smooth.
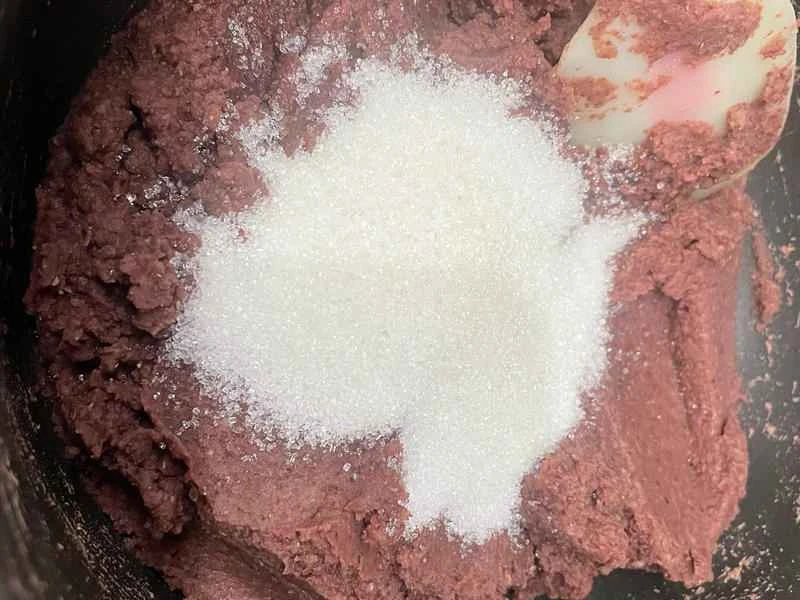
Put the mixed red bean paste back into the rice cooker, add 80 grams of white sugar and 30 grams of butter, and press the steam/cook button to heat.
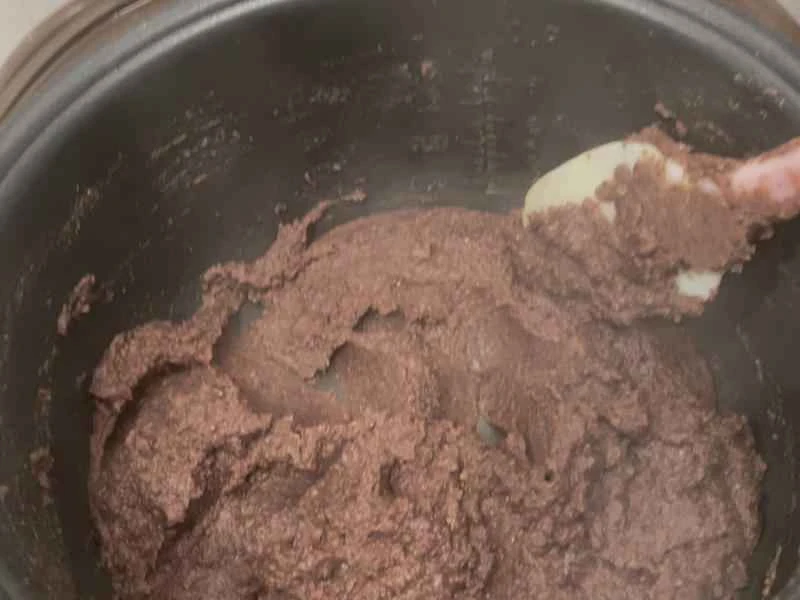
While heating, stir constantly until the sugar, butter, and red beans are fully mixed, and a spoonful of filling slowly drips down.
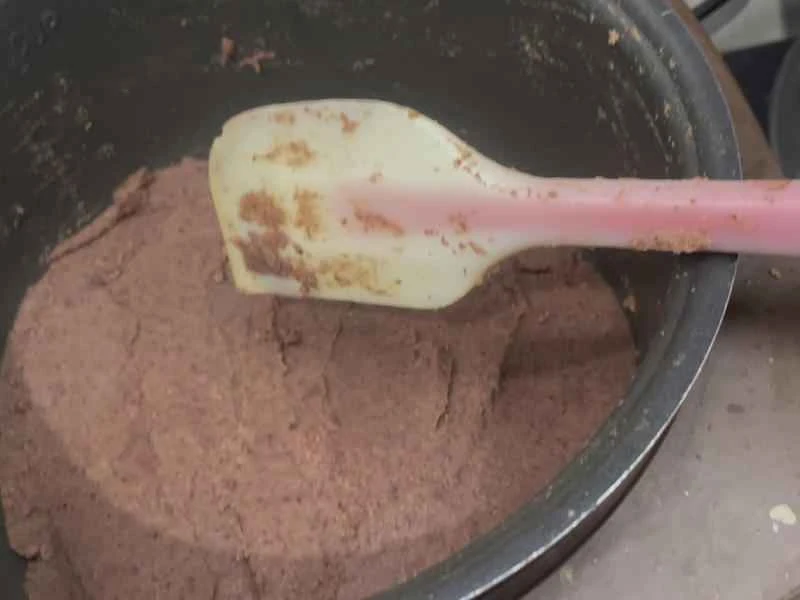
After the red bean paste has cooled, it has a delicate and soft texture. When you scoop a spoonful of it and turn the spoon over, the paste will stick to the spoon and won't fall off.

Divide the red bean paste into 20 portions, each weighing 30 grams, roll them into balls, and seal them with plastic wrap to prevent them from drying out.
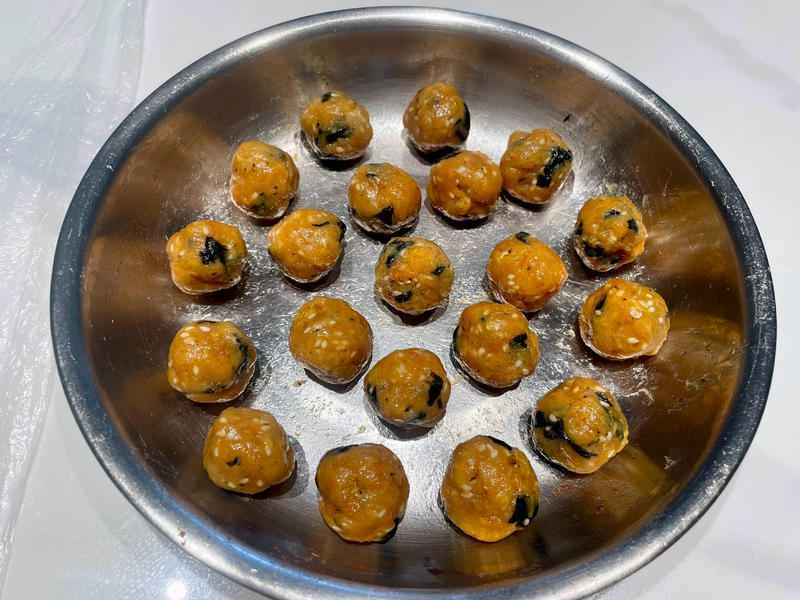
Add 100g of seaweed and pork floss to 100g of salad dressing. Mix the pork floss and salad dressing until it forms a dough, divide it into 20 portions, and roll each portion into a ball (10g). It looks a bit like egg yolk, doesn't it? 😂
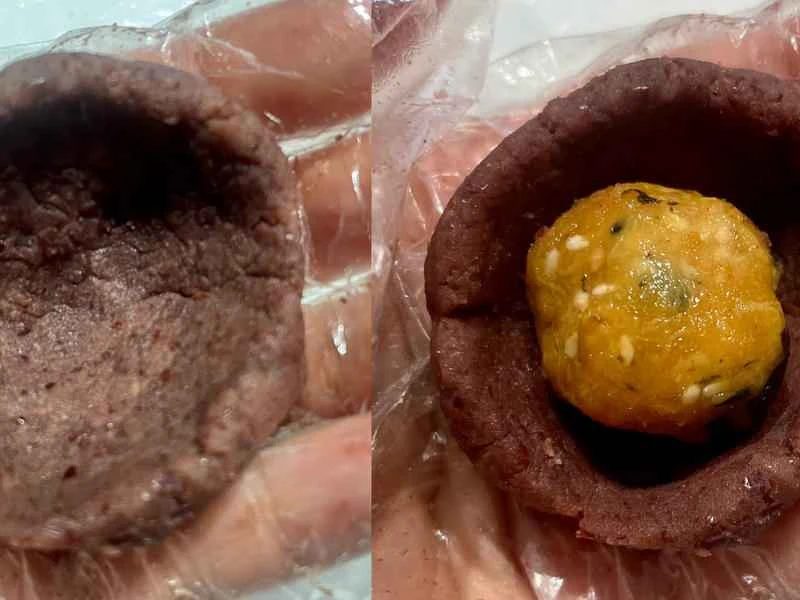
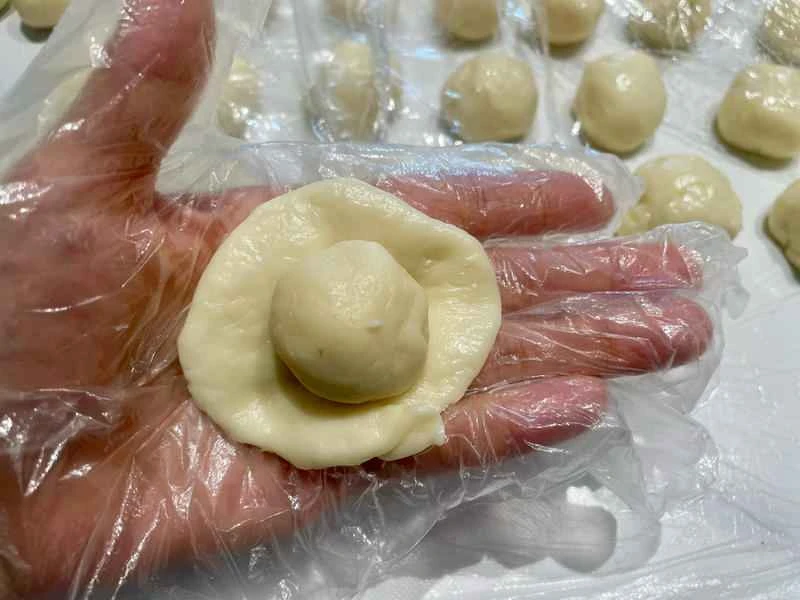
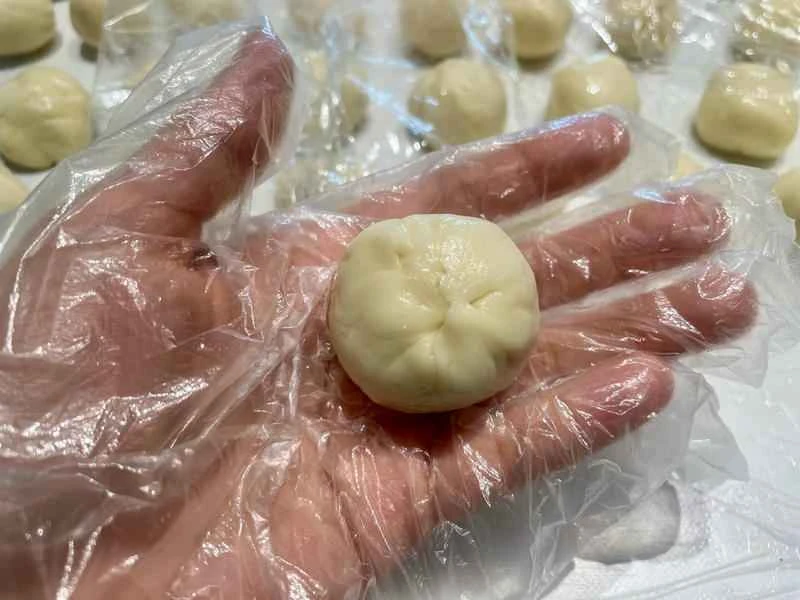
Make a hole in the red bean paste, wrap the pork floss filling inside, seal the opening with your thumb and forefinger, and roll it into a ball. Once all are wrapped, cover them with plastic wrap to prevent them from drying out.
Let the oil-based dough come to room temperature slightly after being removed from the refrigerator. ‼️ The oil-based dough is quite hard after being taken out of the refrigerator, so it must be kneaded thoroughly, like washing clothes, until it reaches the same consistency as the oil-based dough. This will prevent it from breaking easily; otherwise, the oil-based dough will not be soft enough when rolling out the dough, causing it to break and mix with the oil-based dough.‼️
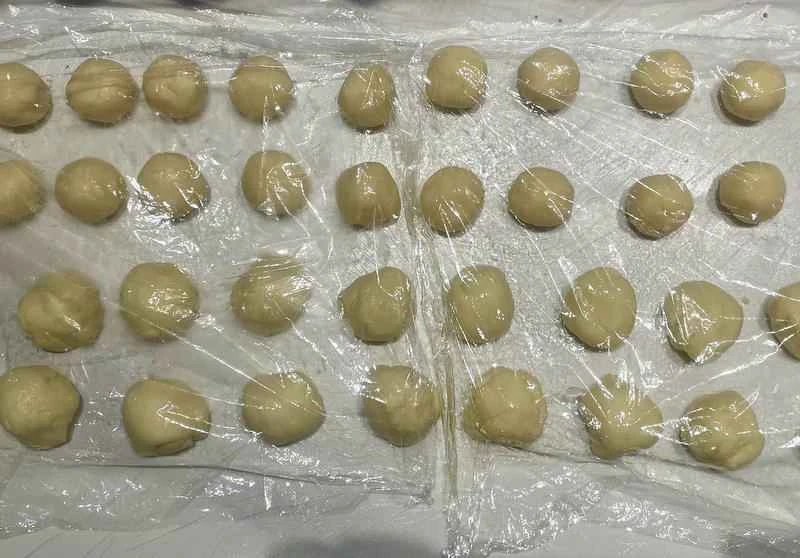
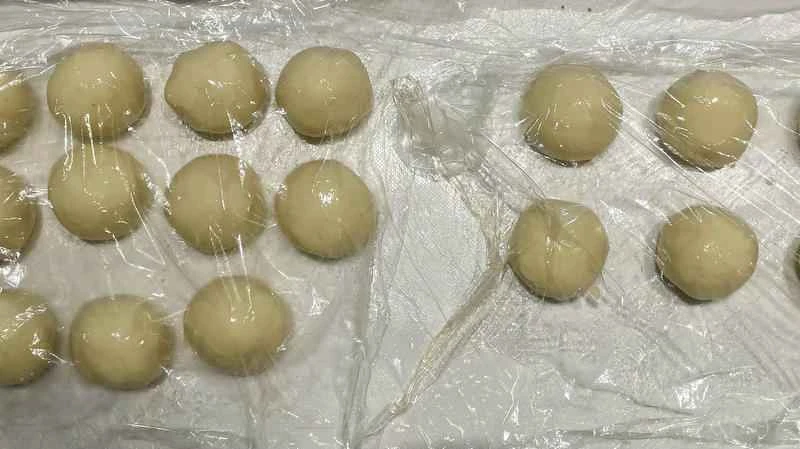
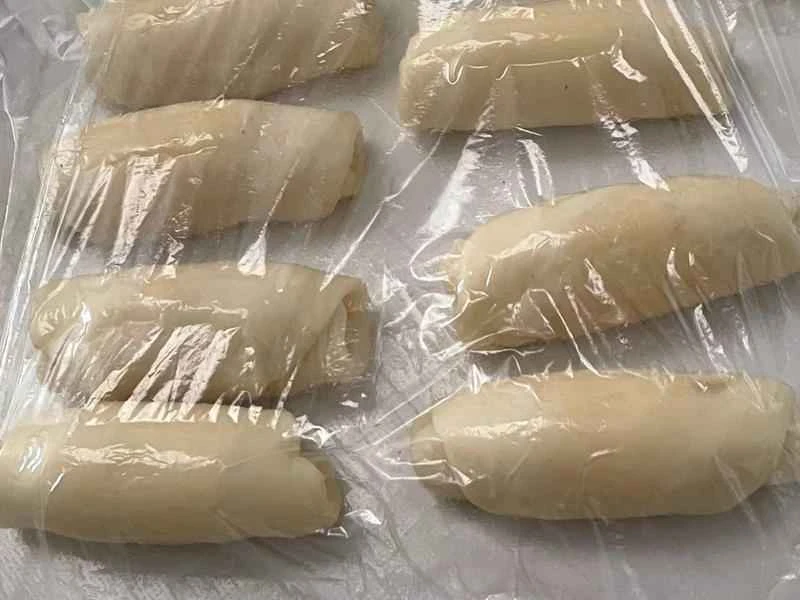
Divide the water dough into 20 equal portions, roll them into balls, and seal them with plastic wrap to prevent them from drying out. Divide the oil-based dough into 20 equal portions as well, roll them into balls, and seal them with plastic wrap to prevent them from drying out.
No need to let it rest. Directly wrap the dough, take out the first oil dough with the seam facing up, flatten it (the technique for this step is not required), and place the oil dough on top.
Wrap it up like a bun, pinch the opening tightly to prevent the filling from leaking out, and place it seam-side down.
Wrap everything up and seal with plastic wrap for 10 minutes to prevent it from drying out.
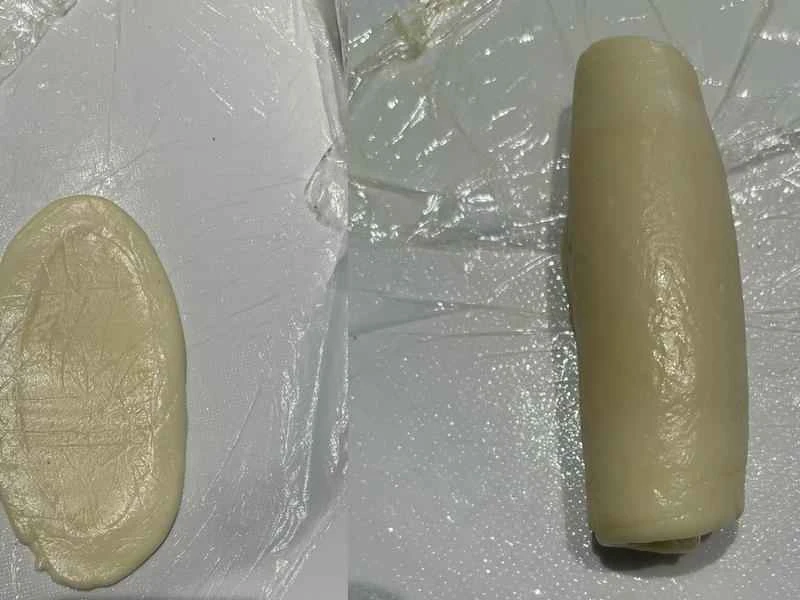
First rolling: Take the first relaxed dough, turn it over with the seam facing up, and gently flatten it. Place the rolling pin in the middle and gently roll it up and down once each, until it forms an oval shape about 8cm long. ‼️ Do not roll it too long, do not roll it back and forth, and do not use too much force, as this will easily break the dough and cause the pastry to mix. ‼️ Then roll it up from top to bottom.
Once everything is done, seal with plastic wrap and let it rest for 5-10 minutes to prevent it from drying out. Those who are slow at working don't need to let it rest.
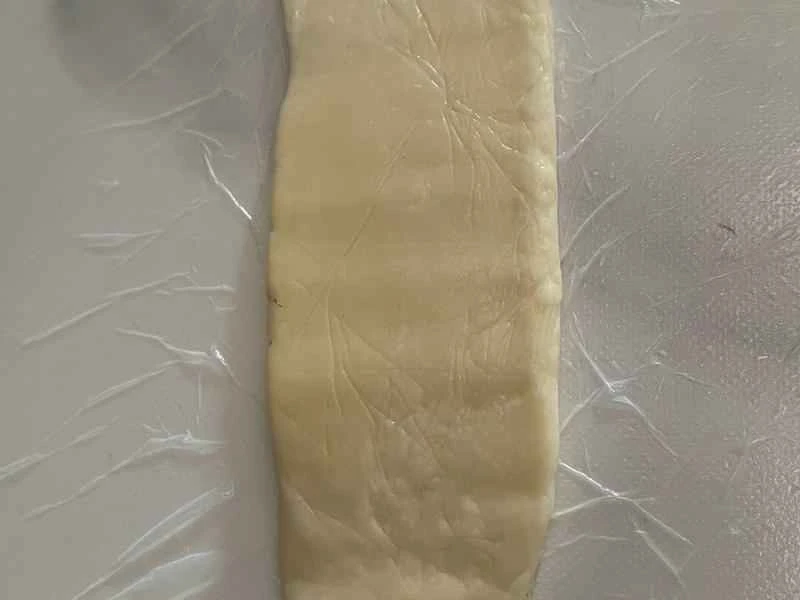
Second rolling after relaxation: Take a relaxed pastry, with the sealed side facing up, place the rolling pin in the middle and gently roll it up and down once each, until it is about 18cm long. Do not roll it too long, and do not roll it back and forth. Do not use too much force as it will easily break the pastry. Then roll it up from top to bottom.
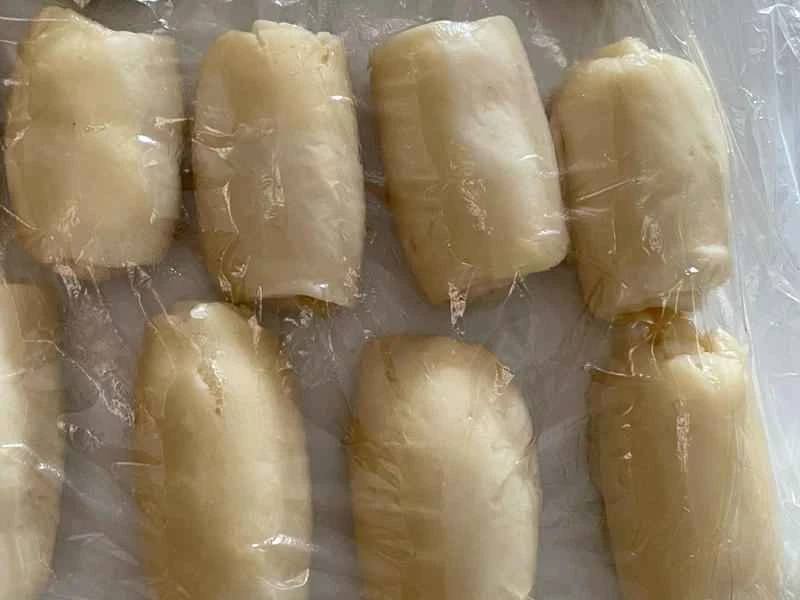
Once everything is done, seal it again and let it rest for 10 minutes to prevent it from drying out. Those with slower hands don't need to rest.
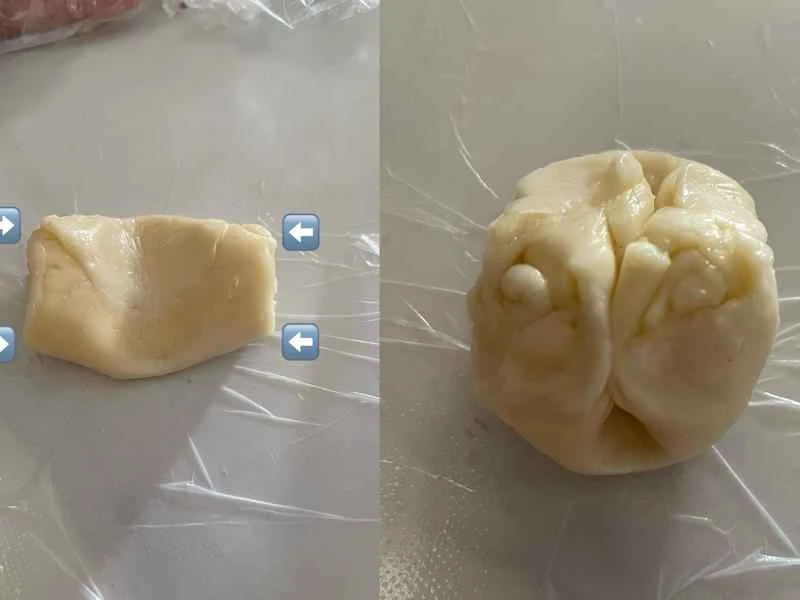
Filling: Take a rested pastry, turn it over with the seam facing up, press down in the middle with your index finger, and then use your thumbs and index fingers to push the four corners together and pinch them closed.
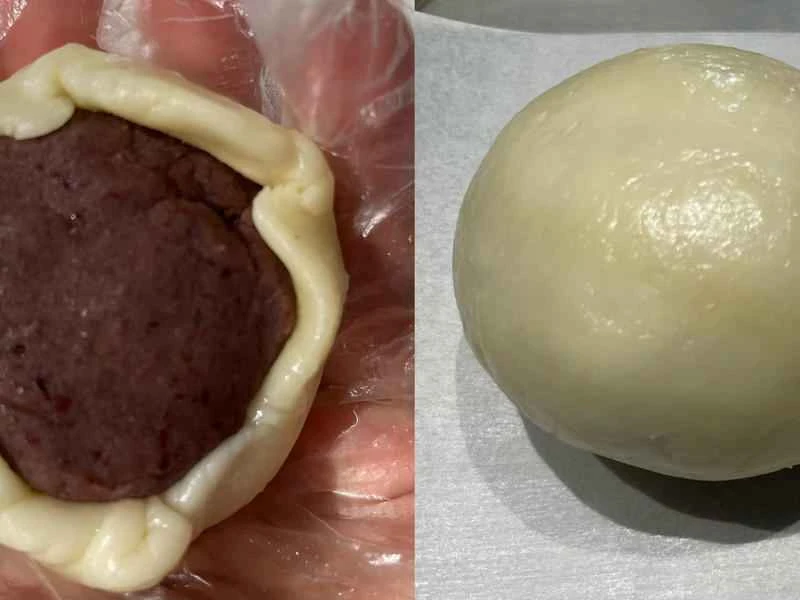
Gently flatten the dough with your palm, then use a rolling pin to gently push and roll it from the center upwards, downwards, left, and right. ‼️ Do not roll back and forth, and do not use too much force, as this will easily break the pastry and cause it to become mushy! ‼️ (I just flattened and rounded it with my palm for convenience before wrapping it 😂😂😂) Try to roll it into a circle that is thicker in the middle and thinner around the edges. A thicker, more flaky top is more aesthetically pleasing for the red bean pastry. Wrap the red bean paste and meat filling inside, and gently twist the opening upwards with your thumb and forefinger to seal it tightly, otherwise the finished product will burst open.
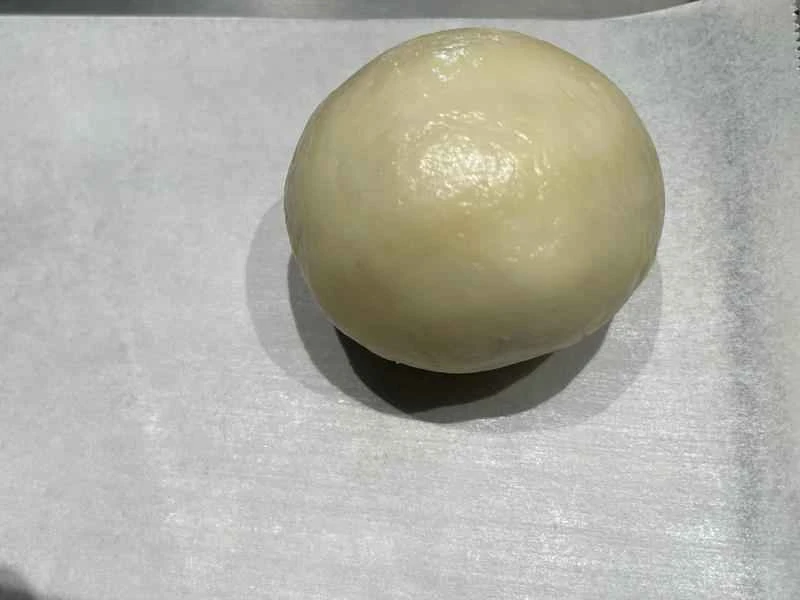
Wrap all the fillings, shape them into round shapes, and place them seam-side down on a baking sheet. Spray with water, seal tightly with plastic wrap to prevent drying, and let rest for about 30 minutes.

Let the dough rest for the last 5 minutes while preheating the oven to 180 degrees Celsius (350 degrees Fahrenheit). Brush the egg yolk mixture onto the top of the red bean pastry (brush twice). Dip a rolling pin in water and then in black sesame seeds, then gently press the black sesame seeds onto the top of the red bean pastry. Alternatively, you can dip your thumb in egg yolk mixture and then in black sesame seeds, and then gently press them onto the top of the red bean pastry.
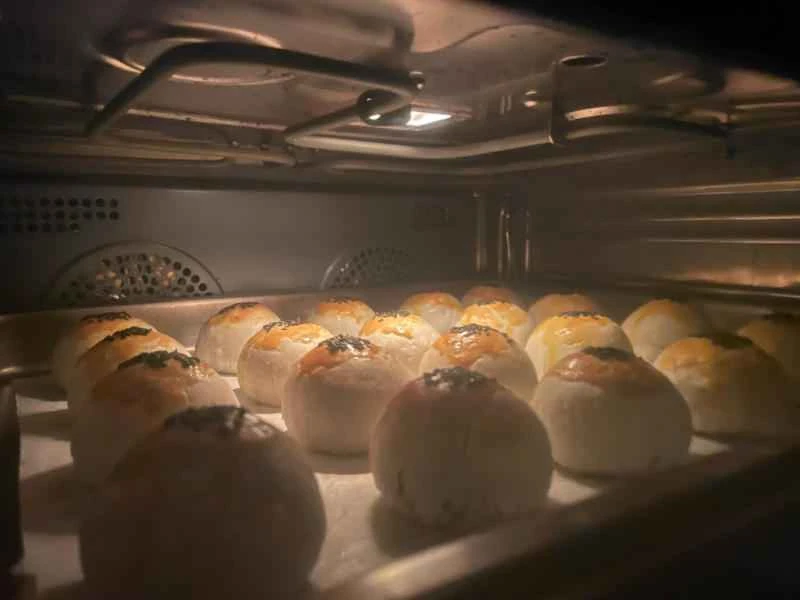
Place in a preheated oven on the lower middle rack and bake at 180 degrees Celsius (350 degrees Fahrenheit) for 30 minutes. Then, place the red bean pastries on the middle rack and bake at 180 degrees Celsius (350 degrees Fahrenheit) for another 5 minutes. After baking, do not remove them immediately; wait 3 minutes before taking them out of the oven. The specific temperature and time may need to be adjusted according to your own oven. They must be baked thoroughly to achieve a crispier texture and prevent them from becoming soggy.

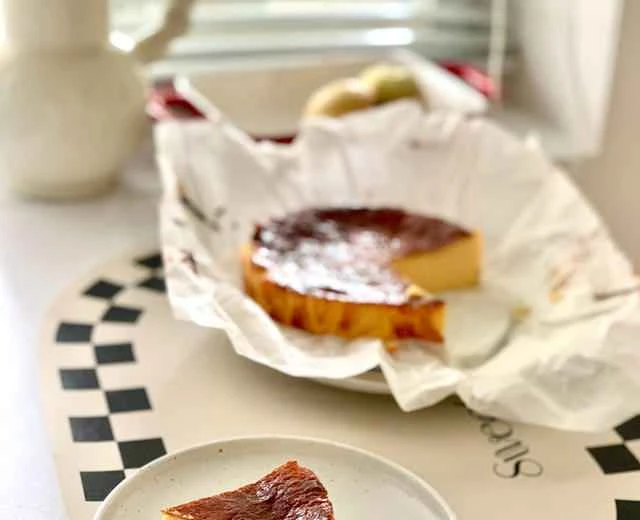
It's out of the oven! The aroma is wonderful! 😋

It's so crumbly it crumbles when you pick it up gently 😂
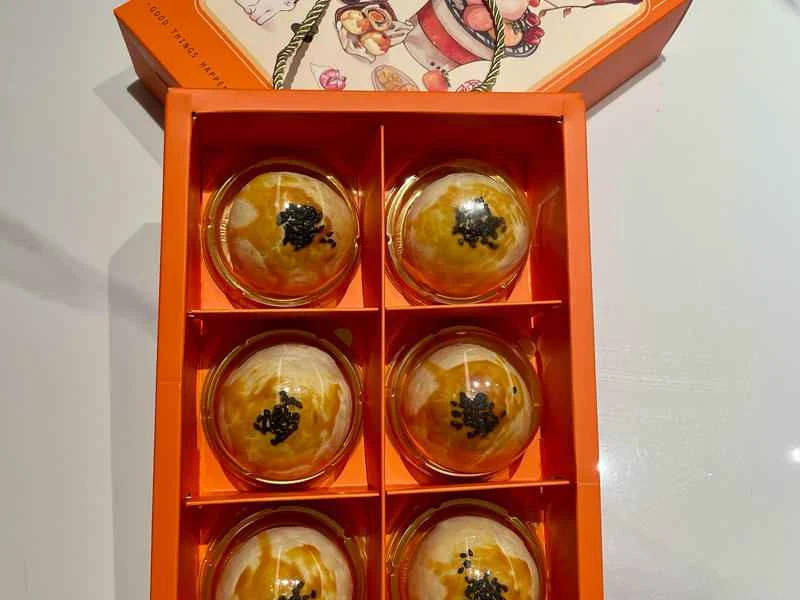
Packed up and ready to be given as a gift, hahaha 🥰🥰 Leftovers can be sealed and stored at room temperature; they'll still be crispy for 3 days. If they lose their crispness, baking them at 180 degrees Celsius for 5 minutes will basically restore their original shape. Do not refrigerate. Seal tightly and freeze any leftovers; they'll still be crispy after thawing.